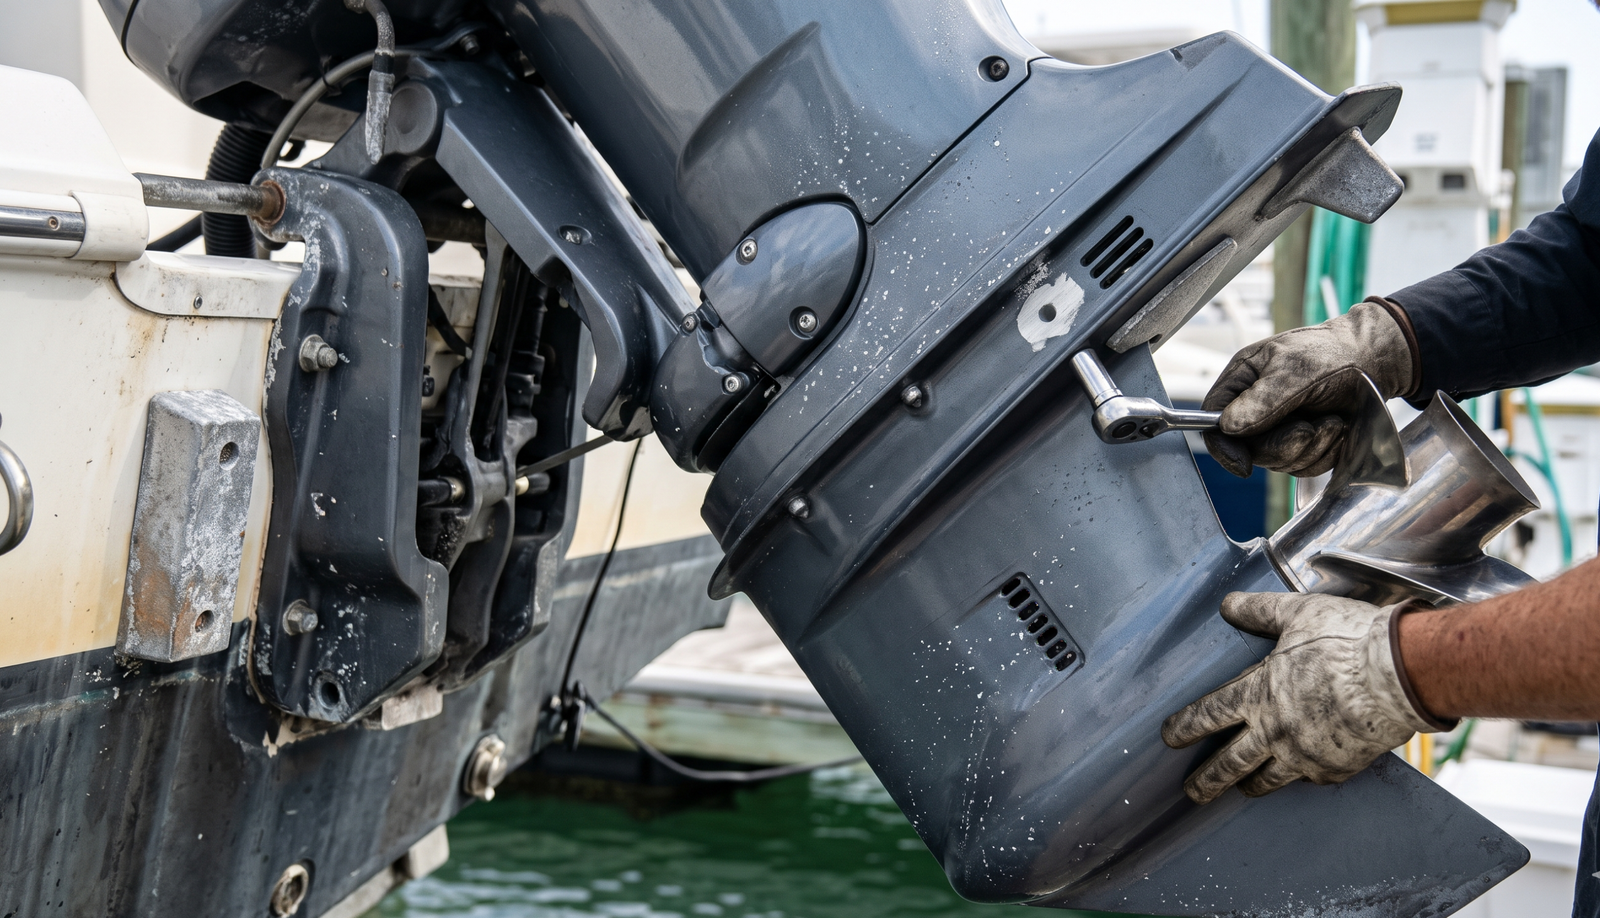
If you operate a Yamaha or Mercury outboard in saltwater, the small sacrificial anodes attached to the engine deserve regular attention. These components are designed to corrode before more valuable underwater metals, helping protect the lower unit, transom bracket, and other submerged components from galvanic corrosion.
An outboard motor zinc anode protects vulnerable engine metals by sacrificing itself as part of the boat’s galvanic corrosion-control system. Inspect the trim-tab anode, lower-unit anodes, and transom bracket anodes regularly. Replace them when approximately half their original material has been consumed, use the correct model-specific alloy and part, and never paint over an anode.
Yamaha and Mercury use several anode locations and configurations depending on horsepower, engine generation, and model. Knowing where to look—and understanding how to replace the correct anode—can help prevent expensive corrosion damage to your outboard.
Why Outboard Motor Zinc Anodes Are Important in Saltwater
Outboard motor anodes help protect aluminum engine components from galvanic corrosion when dissimilar metals are immersed in conductive water. The anode is made from a more active metal or alloy that corrodes preferentially, helping protect components such as the gearcase, propeller-related hardware, and mounting bracket.
Saltwater creates an especially conductive environment. When dissimilar metals such as an aluminum gearcase and a stainless-steel propeller are immersed together, an electrochemical reaction can cause one metal to corrode faster than it otherwise would.
A properly selected sacrificial anode provides a more vulnerable metal surface that preferentially corrodes. Instead of allowing the protected engine component to take the full effect of the galvanic reaction, the anode gradually loses material.
That is why boat owners commonly call these components zincs, even though modern outboard anodes may be manufactured from zinc, aluminum, magnesium, or specialized alloys.
Mercury Marine explains this process in its guide to replacing sacrificial anodes on an outboard motor. The manufacturer also identifies the gearcase and transom bracket as common anode locations.
Where Are Yamaha and Mercury Outboard Anodes Located?
Outboard anode locations vary by engine model, but common positions include the underside of the anti-ventilation plate, the lower unit, the engine mounting or transom bracket, and certain internal cooling passages. Check the exact owner’s manual and parts diagram because not every Yamaha or Mercury outboard uses the same number or arrangement of anodes.
1. Trim-tab anode below the anti-ventilation plate
One of the most recognizable outboard anodes is mounted beneath the anti-ventilation plate, above or near the propeller. On many models, this anode is shaped like a small fin and also serves as a trim tab.
It performs two important functions:
- It provides sacrificial corrosion protection near the propeller and lower unit.
- Its adjustable fin angle helps compensate for steering torque, which can be influenced by propeller rotation.
Because the trim-tab anode performs both functions, installing a replacement at the wrong angle can affect steering behavior. Mercury specifically advises aligning the replacement at the same angle as the original.
2. Lower-unit anodes
Additional anodes may be attached to the lower unit or gearcase. Their position and shape depend on the engine design. Some are small external blocks, while others are integrated into covers or specific mounting points.
These anodes help protect submerged metal around the gearcase. Inspect them carefully because marine deposits, paint, and their position can make wear less obvious than it is on a trim-tab anode.
3. Transom bracket and engine mounting bracket anodes
A Yamaha or Mercury outboard may also have anodes mounted on the transom bracket, swivel bracket, or related mounting assembly. These components protect metal around the engine mounting and tilt-and-steering arrangement.
A transom bracket zinc plate may look different from a trim-tab anode. It can be a flat plate, block, or another model-specific shape. Do not assume that a plate from a different engine family will fit or provide the correct protection.
4. Internal engine anodes
Some outboards also use internal anodes within the cooling system or powerhead. These are not necessarily visible during an ordinary external inspection. Their location and replacement procedure depend on the engine model.
Yamaha owner manuals distinguish between external anodes and internal anodes attached to the power unit. For internal anode inspection and replacement, follow the model-specific service procedure or consult an authorized Yamaha dealer.
Yamaha Outboard Trim Tab Anode Replacement
To replace a Yamaha trim-tab anode, identify the correct part using the engine model and serial information, secure the engine according to the service manual, remove the original anode, and inspect the mounting surface. Install the specified replacement with clean metal-to-metal contact and set the trim-tab fin to the original angle specified for that engine.
Yamaha uses different anode designs across its outboard range. Even engines with similar horsepower ratings can have different mounting arrangements or part numbers depending on model year and engine family.
Step 1: Identify the correct Yamaha anode
Before ordering a replacement, record the outboard’s model code and serial number. Use the Yamaha parts catalog or owner’s manual to identify the correct trim-tab anode.
Do not select a replacement based only on the shape of the old component. The correct alloy, dimensions, mounting hole arrangement, and fit are important for reliable protection.
Step 2: Inspect the old trim-tab anode
Look for material loss, uneven corrosion, deep pitting, looseness, and heavy scale buildup. An anode that has lost approximately half its original material should generally be replaced.
Also inspect the fin itself. If the trim-tab fin has lost substantial material, its steering-correction function may be affected even when part of the anode body remains.
Step 3: Remove and inspect the mounting area
Follow the engine-specific procedure to remove the fastener and old anode. Inspect the mounting surface for corrosion, deposits, damaged threads, or other conditions that could interfere with electrical contact.
Mercury recommends cleaning the mounting surface so the replacement anode has good contact with the metal it protects. The same basic contact principle is important when servicing a Yamaha anode, but use the cleaning procedure and hardware specified for the particular engine.
Step 4: Install and align the replacement
Install the correct replacement anode and specified mounting hardware. On models where the anode doubles as a trim tab, preserve the original fin angle or use the adjustment procedure in the owner’s manual.
Do not guess the fastener torque. Use the model-specific service information, and confirm that the anode is securely installed without damaging the mounting threads.
Yamaha’s official outboard corrosion-prevention guidance recommends inspecting anodes regularly and replacing them when approximately 50% consumed. Yamaha also warns against painting or covering anodes.
Mercury Verado Anode Kit: What Should You Check?
A Mercury Verado anode kit must match the exact Verado engine model and serial range. Depending on the engine, the kit may include anodes for the gearcase, transom bracket, or other specified locations. Confirm the kit contents and alloy against the Mercury parts catalog before ordering rather than assuming every Verado uses the same replacement set.
Mercury’s corrosion-protection system uses sacrificial anodes at strategic locations to protect aluminum components. The manufacturer offers model-specific anode kits and recommends replacing anodes when approximately half their material has been lost.
Inspect the Mercury lower-unit anode
Check the lower-unit anode for material loss, scale, and signs of uneven corrosion. Pay attention to the area around its mounting point, since corrosion or deposits between the anode and the engine can affect electrical contact.
Check the Mercury trim-tab anode
On many Mercury outboards, the trim-tab anode is positioned beneath the anti-ventilation plate near the propeller. Inspect both the anode body and the fin.
When installing a replacement, Mercury advises matching the original trim-tab angle. The mounting surface should be clean enough to provide good contact with the protected metal.
Inspect bracket and mounting anodes
Check the transom bracket and other external anode locations shown in the engine’s maintenance manual. Some Mercury configurations have multiple anodes in different positions.
Do not overlook anodes around the tilt and trim assembly or other bracket components simply because the lower-unit trim tab looks healthy.
For model-specific information, use the Mercury Marine website and authorized dealer network. Mercury’s anode inspection guide explains why neglected anodes can leave the lower unit and aluminum components exposed to corrosion.
When Should You Replace an Outboard Motor Zinc Anode?
Replace an outboard sacrificial anode when approximately 50% of its original material has been consumed, or earlier if it is loose, damaged, missing, or no longer providing reliable contact. Inspect more frequently in saltwater and follow the engine manufacturer’s maintenance schedule for the exact model.
The 50% guideline is widely used by Yamaha and Mercury, but it is not a reason to ignore an anode that has deteriorated unevenly or lost its mounting integrity.
Use this inspection guide:
| Anode condition | What it indicates | Recommended action |
|---|---|---|
| Original shape mostly intact | Limited visible material loss | Continue regular inspections |
| Approximately 50% consumed | Significant sacrificial material has been used | Replace with the specified anode |
| Loose or missing | Protection may be compromised | Investigate mounting and replace as required |
| Heavy scale or surface deposits | Deposits may interfere with anode performance | Clean according to manufacturer instructions and reassess |
| Little or no visible corrosion over time | Could indicate an unsuitable alloy, poor electrical contact, or another system issue | Check the anode specification and corrosion-protection system |
| Deep pitting or uneven deterioration | Possible local corrosion or electrical issue | Inspect the mounting surface and surrounding components |
An anode that looks almost new is not automatically proof that corrosion protection is working correctly. Mercury notes that anodes showing no signs of wear may indicate that the protection system is not functioning as intended. Check the material specification, electrical continuity, and surrounding components if anodes show unusually little consumption.
Choosing the Right Anode Alloy for Saltwater
The correct anode alloy depends on the engine manufacturer’s specification and the water in which the boat operates. Zinc and aluminum alloys are commonly used in saltwater applications, while magnesium is generally intended for freshwater. Do not substitute an alloy based only on availability; use the material specified for the outboard and its operating environment.
Although boat owners often use the word zinc for every sacrificial anode, different alloys behave differently in different water conditions.
Zinc anodes
Zinc has traditionally been used for sacrificial protection in saltwater. It is still used in many marine applications, but the correct zinc alloy and compatibility with the protected metal system matter.
Aluminum anodes
Aluminum-alloy anodes are used in many modern outboard applications. Mercury, for example, offers aluminum-alloy anode kits for many outboard and sterndrive applications. Yamaha also specifies proprietary anode alloys for its products.
Do not assume that any aluminum anode is suitable for every engine. Use the correct marine anode alloy and manufacturer-approved replacement.
Magnesium anodes
Magnesium anodes are generally used in freshwater because of their high activity. They can be consumed very rapidly in saltwater and are not a universal substitute for zinc or aluminum-alloy anodes.
For more detail, read Yamaha’s marine anodes explanation, which discusses anode locations, material selection, and the importance of replacing anodes as they corrode.
Outboard Lower Unit Corrosion Protection: Common Mistakes to Avoid
Most anode-related protection problems begin with incorrect alloy selection, poor mounting contact, neglected inspections, or coating the anode with paint. Keep anodes exposed to the water, maintain clean mounting contact, and use the correct replacement parts. Also investigate unusual corrosion rather than assuming a new anode alone will solve it.
1. Painting over the anode
Never paint or cover a sacrificial anode. It must remain exposed to the water to perform its intended function. Mask it when repainting the lower unit or bracket.
2. Installing the wrong alloy
A visually similar anode may have a different alloy or intended water application. Check the manufacturer’s part information before installing a replacement.
3. Ignoring the mounting surface
Corrosion, scale, paint, or deposits at the mounting interface can interfere with electrical contact. Follow the specified cleaning procedure and ensure the replacement is properly seated.
4. Forgetting the trim-tab angle
A trim-tab anode may also help counter propeller steering torque. Installing it at an incorrect angle can change steering behavior. Record the original position before removal and follow the engine’s adjustment instructions.
5. Treating anodes as the only corrosion protection
Anodes are one part of a wider corrosion-control system. Freshwater flushing, rinsing salt residue, maintaining paint, and inspecting electrical connections are also important.
Yamaha recommends regular flushing and corrosion-prevention maintenance. Mercury also advises flushing saltwater from the cooling system and rinsing the outboard after use. See Mercury’s corrosion-prevention guidance.
Does Tilting an Outboard Affect Anode Wear?
Tilting an outboard does not automatically make its anodes wear faster or slower. Anode consumption depends on the galvanic system, water exposure, alloy, electrical contact, and operating environment. However, the tilted position can change which surfaces remain immersed, how salt deposits collect, and how easily you can inspect the bracket and trim components.
When a boat is stored with its outboard tilted, some anodes may be exposed to air while others remain partly submerged, depending on the engine position and water level. This can change their exposure conditions, but it does not replace the need for regular inspection.
Pay particular attention to:
- Trim-tab anode material loss and fin condition
- Lower-unit anodes that may be hidden by the engine position
- Transom bracket and swivel bracket anodes
- Corrosion around trim rams and mounting hardware
- Salt deposits around exposed metal and electrical connections
Do not assume that an anode is healthy because it looks clean after the engine is tilted. Inspect the actual metal and mounting contact, and follow the manufacturer’s recommended storage and flushing procedures.
How Often Should You Inspect Yamaha and Mercury Outboard Anodes?
Inspect external outboard anodes regularly, especially when operating in saltwater or keeping the boat in the water for extended periods. Include them in routine engine checks and scheduled maintenance. Replace them at approximately 50% consumption, or sooner if their condition or mounting is compromised.
A practical inspection routine includes:
- Checking the trim-tab anode and lower-unit anodes during routine engine inspections
- Inspecting transom bracket and other external anodes
- Looking for loose fasteners, uneven wear, scale, or missing components
- Checking for paint or other coatings covering the anodes
- Reviewing internal anode maintenance requirements in the engine manual
- Recording replacement dates and part numbers for future maintenance
Saltwater use, marina electrical conditions, shore-power connections, dissimilar underwater metals, and the condition of the vessel’s bonding system can all influence corrosion behavior. If anodes disappear unusually quickly or show almost no wear, have the system investigated rather than simply installing replacements more frequently.
Frequently Asked Questions
Where is the anode on a Yamaha outboard motor?
Yamaha outboard anodes may be located beneath the anti-ventilation plate, on the lower unit, and around the engine mounting bracket. Some models also have internal anodes within the cooling system. Exact locations vary, so use the owner’s manual and parts diagram for your engine model and serial number.
When should I replace a Yamaha trim-tab anode?
Replace the anode when approximately half its original material has been consumed, or sooner if it is loose or damaged. Check the fin as well as the body because the trim-tab anode may help correct steering torque. Install the replacement at the specified original angle.
Does a Mercury Verado need a special anode kit?
The correct Mercury Verado anode kit depends on the exact engine model and serial range. Different configurations may use different anode locations, shapes, and alloys. Confirm the replacement kit against the Mercury parts catalog or an authorized dealer before ordering and installing the components.
Can I use zinc instead of an aluminum anode on my outboard?
Not automatically. The correct material depends on the engine manufacturer’s specification and the operating water. Zinc and aluminum alloys are common in saltwater applications, while magnesium is generally intended for freshwater. Use the specified alloy and do not substitute based on appearance or availability.
Should outboard anodes be painted?
No. Sacrificial anodes must remain exposed to the water to provide corrosion protection. Painting or covering them can prevent them from working correctly. Mask anodes when repainting the lower unit or engine bracket, and replace any component that has been damaged or incorrectly coated.
Why is my outboard anode not corroding?
An anode that shows little or no wear may have the wrong alloy, poor electrical contact, or an issue elsewhere in the corrosion-protection system. It does not automatically mean the engine is protected. Check the specification and mounting surface, and have the system assessed if consumption remains unusual.
Read More: Underwater Corrosion Protection and Marine Maintenance
Outboard anodes are one part of your boat’s underwater corrosion-protection system. You can also learn about professional zinc replacement in South Florida, underwater inspections, and underwater hull cleaning.
For additional vessel-care information, explore our Underwater Marine Services blog.
Protect Your Yamaha or Mercury Outboard from Corrosion
Replacing an outboard motor zinc anode is a relatively small maintenance task compared with repairing a corroded lower unit, bracket, or other expensive engine component. Regularly inspect the trim-tab anode, lower-unit anodes, and transom bracket plates, and use the exact alloy and replacement part specified for your Yamaha or Mercury outboard.
Do not overlook the trim-tab angle, mounting contact, or the condition of anodes that appear to be wearing unusually slowly. A complete corrosion-prevention routine also includes freshwater flushing, rinsing salt deposits, and inspecting the surrounding underwater metalwork.
If your boat needs underwater zinc inspection or replacement, Underwater Marine Services can help assess its corrosion-protection needs and discuss the appropriate maintenance service.
Contact Underwater Marine Services to discuss your boat’s anode and corrosion-protection needs.
